In this article, we will discuss the proper technique for the use of bow sights, different types of bow sights, and how to make the best use of the sight you have.
When talking about a “bow” in this article, we are referring to compound bows with fixed sights.
Some recurve bows do use sights, and many of these tips can carry over into the use of recurve and longbows, but the majority of these traditional archery systems do not use any sights at all.
There are three general types of sights to be used on a compound bow.
Those three types are fixed pin sights, single pin sights, and pendulum sights. Often there are other names used for these sights as well, but they are all referring to one of these three categories.
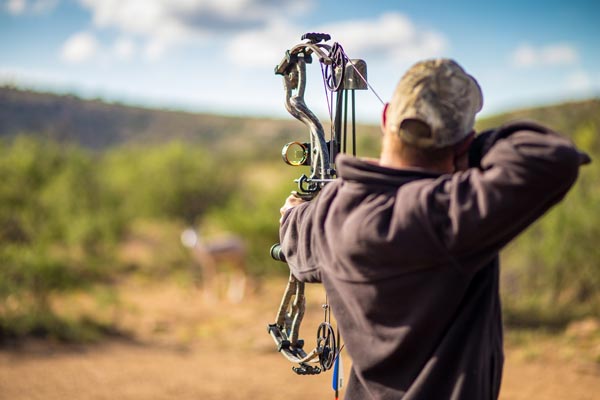
Fixed pin sights are by far the most commonly used bow sights. These sights, often called multi-pin sights, have anywhere from two to seven or eight individual sight pins all located in a vertical line.
The intention with these sights is to set each pin to represent the zero at a predetermined distance.
For example, in a 4-pin fixed sight, many hunters will set the top pin to be zeroed at 10 yards, second from top at 20 yards, etc until the bottom pin is zeroed at 40 yards.
This allows the shooter to be accurate within 10-yard intervals out to 40 yards.
In a single pin setup, instead of multiple pins being zeroed at certain yardages, that single pin is moved up or down on a sliding scale to match the distance of the target.
These sights are very accurate since there is no estimating between set pin distances.
The biggest drawback to the single pin sights is that in hunting situations, setting the sight to the right distance takes time and can ruin short-lived opportunities.
Pendulum sights use one single pin and can be adjusted similarly to the way that other single pin sights are adjusted.
The difference with these sights is that they account for the change in distance created by shooting from elevated surfaces.
These sights are not suggested for beginners, but if you would like to learn more, Wasp Archery explains how they function in much more detail.
How do you install and set up a bow sight?
Since they are by far the most commonly used, our how-to examples will be geared toward the use of fixed pin sights.
After mounting the sight to your bow, you will need to decide what distances you want to use for your zero.
If you have a 4-pin sight, let’s start at 10 yards since it is close enough to provide some safety in case your sight is way off the mark out of the box.
Begin by using a rangefinder, stepping off, or measuring out 10 yards from your target.
Once you are there, shoot one arrow into the target aimed at a very specific point.
Did you hit where you were aiming? Maybe you hit the target five inches left of where you were aiming.
Heres the biggest and simplest trick to sighting in your bow sight, “Follow your arrow”.
What that means is, if your arrow hit the target to the left of where you were aiming, you should move your sight pins the left.
If the “follow your arrow” explanation does not quite make sense, Live Outdoors discusses sighting in more detail.
Learning to use the sights on your bow can be a challenge, but will also be very rewarding once you get dialed in.
One of the greatest archers of our time, Mr. Levi Morgan, often posts helpful tips and tricks for shooting online through social media and other outlets.
If a picture says a thousand words, a video must be invaluable to learning a new hobby.
In this Youtube video, Levi discusses one of his many tricks to properly sighting in your bow which will help you get on a perfect zero.
In the world of archery, as in many aspects of life, consistency is key.
Even if you have sighted in your bow perfectly, if your anchor point is off by just a fraction of an inch, your shooting will never be consistent.
Your anchor point is where your hand meets your face, or where the bowstring meets your face at full draw.
According to Sole Adventure, the author discusses further detail about anchor points and the importance of consistency for accurate shooting.
There are a couple tools to help you stay consistent with your anchor point. One is a “kisser button” which is nothing more than a small rubber stopper that wraps around your bowstring.
It is called a kisser button because when you are at full draw, it should “kiss” your face in the same spot every single time.
The other tool for consistent anchor points is called a peep sight. It is usually a more fool-proof way to create a consistent anchor point because, as the name implies, you must look through the small hole placed in your bow string to see the front sights that you have just set up.
By having to look through this small hole, it effectively acts as a rear sight to make sure that where you hold your string at full draw is the same place every single time you shoot an arrow.
American Hunter magazine offers some great tips for beginning archers through both their print and online media.
In this article, author Bill Winke shares ten great tips to becoming a better archer.
Careful preparation while sighting in, and consistent movements (especially your anchor point!) will help you become a better archer.
If you are serious about learning a great new hobby in the world of archery, or possibly just improving your existing skills, be sure to learn as much as you can from qualified pros.
Most workers at any archery store are willing to help out new archers and enjoy sharing what they have learned.
With so many great shooters making tips and tricks available to the public, you should be able to hone your skills quickly and become an effective shooter in no time.